Installing and Configuring Sophos Firewall Home as a VM on Proxmox
Sophos Firewall Home Edition on Proxmox with 2.5Gbps download speed!
Hardware: Minisforum MS-01 (i5-12600h and 16gb Ram)
Hypervisor: Proxmox VE 8.2.4
Firewall: Sophos Firewall Home Edition V20 - KVM download
When looking at the various forums and online resources, you will find many opinions on what firewall is best, and those in the Home Lab community are passionate about which one and why. The same can be said for running the firewall in a VM.
The Sophos Firewall UI itself is intuitive and relatively painless to set up. After the initial configuration, I rarely find the need to adjust settings. More importantly, when implemented on my home network, the family seldom has complaints. That being said, the Gigabit NIC limitation found in the Sophos Firewall software can be annoying and has been one of the biggest drawbacks. Sophos Firewall Home is free for personal use with some caveats best explained elsewhere. Suppose you are lucky enough to have home internet above 1Gbps or a LAN network capable of 2.5Gb connectivity. In that case, the home version of Sophos Firewall will not be able to utilize all of the speeds you have available. The only way to get around this is to virtualize the Sophos Firewall.
It's easy to find recommendations on running Sophos in Proxmox; however, I have not found much reliable information about the speeds you can achieve when virtualized in this manner. Mostly, I have seen that it can be done, and you will get over 1 Gbps throughput. A combination of the hardware listed above and the following Proxmox configuration has helped me eliminate the throughput bottleneck of a Sophos Firewall
I will not be walking through setting up the initial installation and configuration of Proxmox. Instead, I am focusing on setting up the Sophos Firewall Home Edition on an existing Proxmox Hypervisor.
I must say I am in no way an expert. Please take my processes with a grain of salt and know this is how I have accomplished the project, this may not be the most optimal or secure method. We are always learning so please feel free to comment and help improve the process. If you have a better or more secure way of accomplishing the end goal constructive criticism is encouraged.
Using the process below, I have successfully achieved multi-gig performance on a virtualized Sophos firewall for my home network.
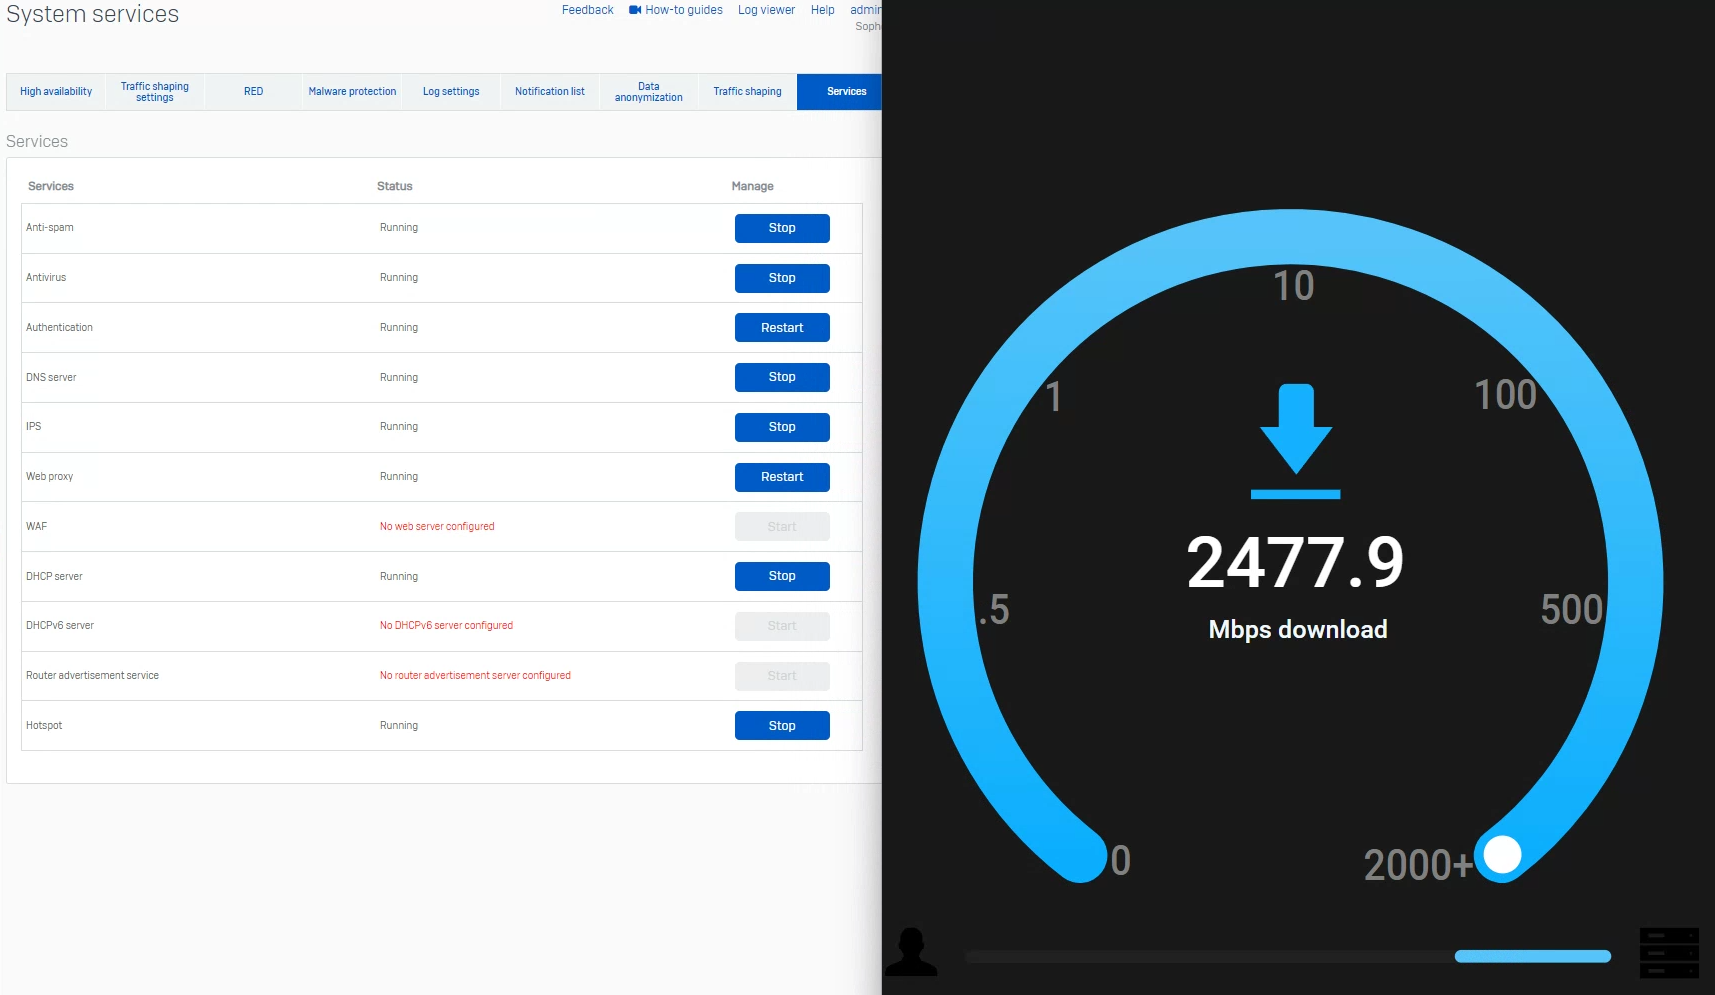
The test environment consists of a PC running Windows 11 connected to the LAN of Sophos Firewall. The WAN of the Sophos Firewall is connecting to my home network where I have An OpenSpeedTest server running.

You can just head to Sophos website and download the .zip file for KVM containing the 2 disks.
https://www.sophos.com/en-us/products/next-gen-firewall/free-trial
The tricky part is adding the disks to Proxmox. An ISO is much easier, however, here are the steps I found for installing Sophos using the KVM files.
Create Virtual Machine
Login to the Proxmox web interface and Select Create VM:
General
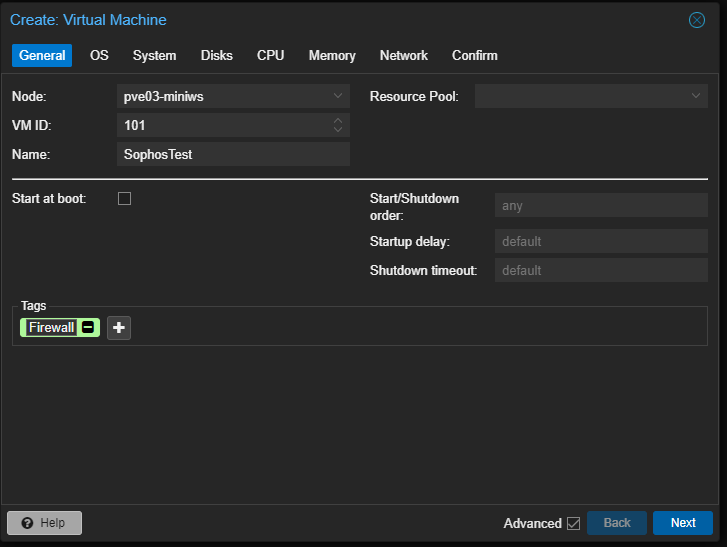
Name the virtual machine and change the VM ID if you desire.
I like to create tags under the advanced section - this is optional and you may not find it helpful.
OS
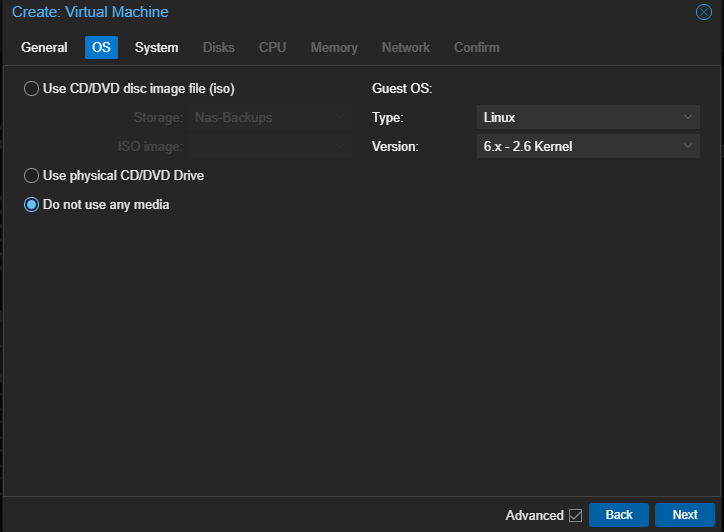
Under OS leave the type as "Linux" and select "Do not use any media".
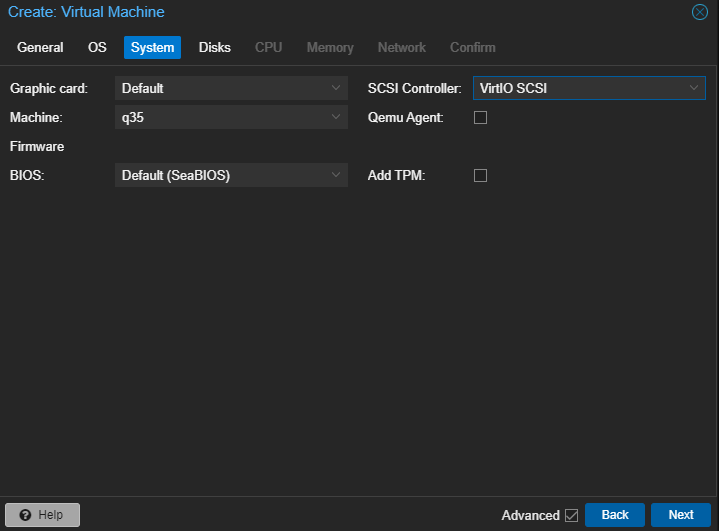
System tab change Machine to "Q35" and SCSI Controller to "VirtIO SCSI"
DISKS
No changes are needed for the Disk Tab as we will be configuring this later.
CPU
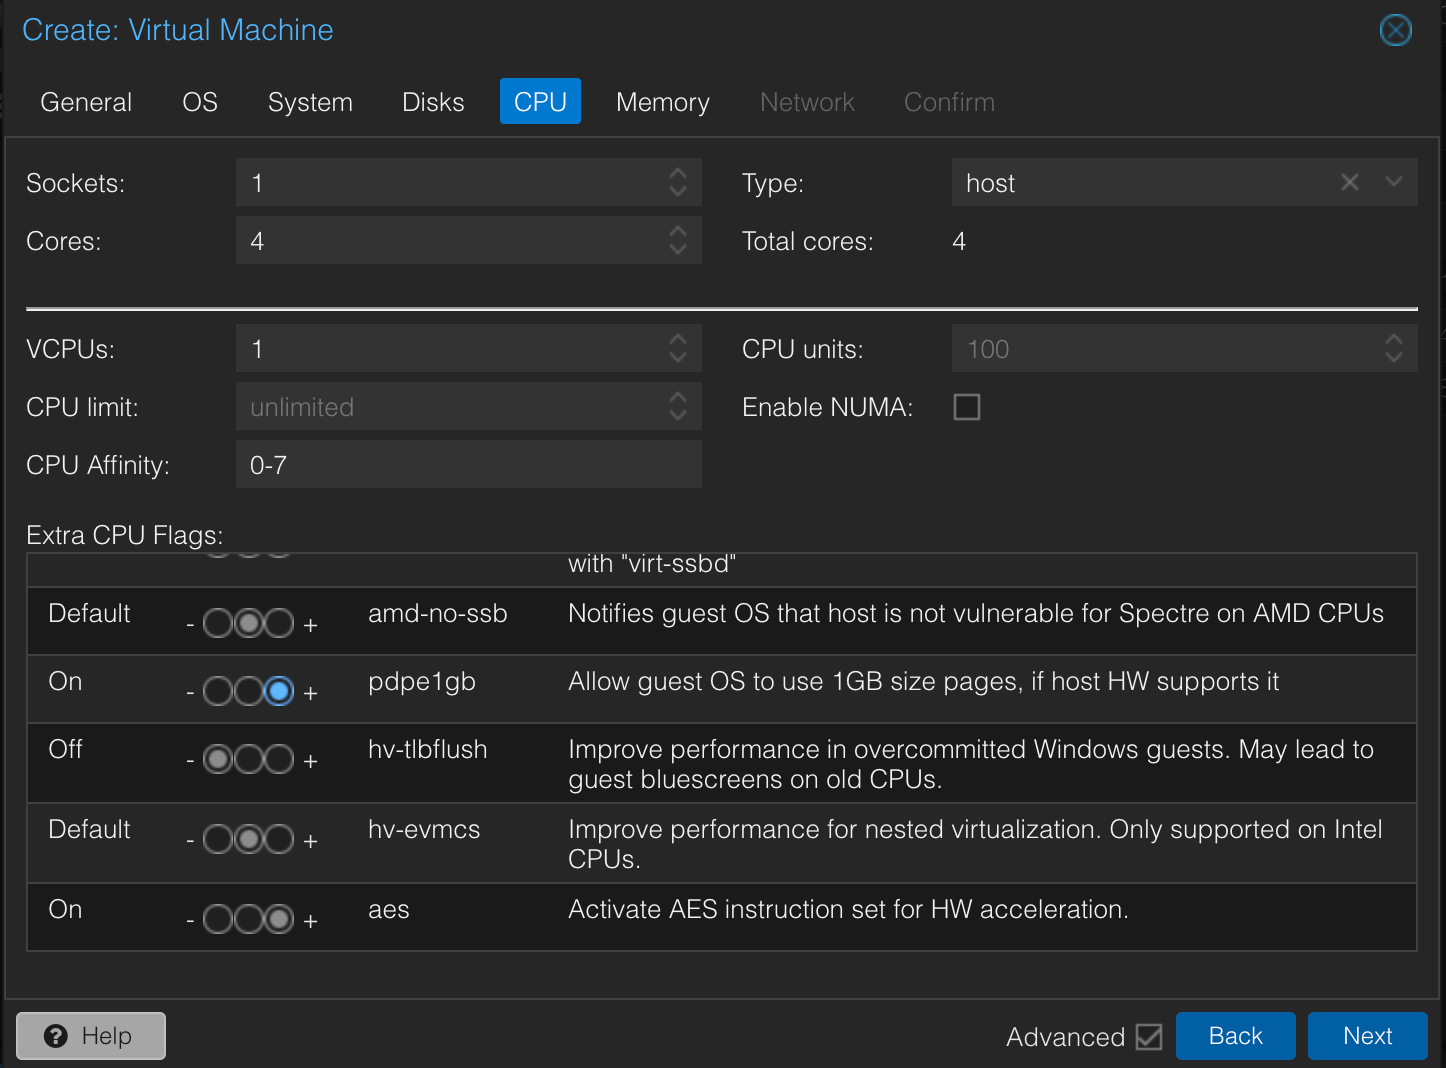
For the CPU tab the max cores Sophos Home will use is 4.
1 socket, 4 cores, type changed to "host"
Under the advanced section
Set 4 VCPU.
The flags I changed in advance may not be important, however, I achieved consistent speed tests with these this way so will just leave it this way for now.
pdpe1gb: on
hb-tlbflush: off
aes: on
CPU Affinity is important for my intel device to ensure that the Firewall does not keep switching to efficiency cores. This can be edited after the VN has been created so you do not interrupt the creation of the VM.
In Proxmox Shell the following prompt will show you CPU info and core id's:
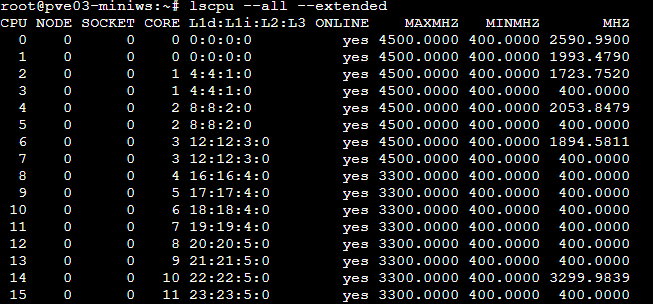
In my case cores 0-7 are the 4 performance cores with hyper-threading. Cores 8-15 are 8 efficiency cores as seen by the lower MHZ.
Memory
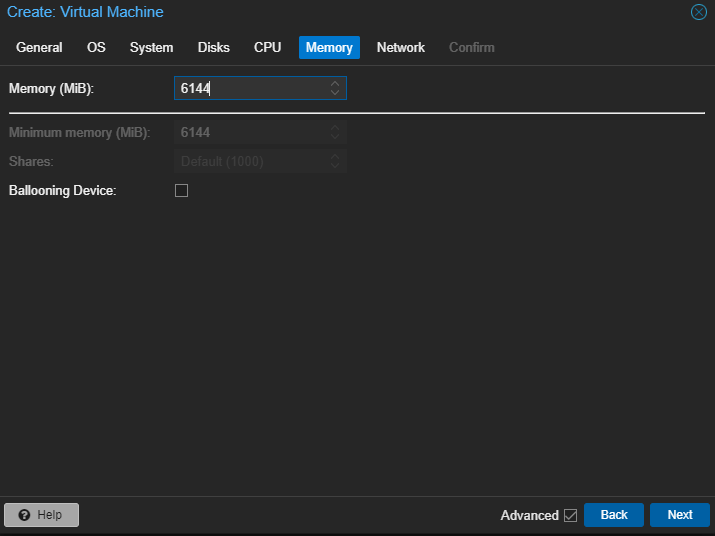
In the memory tab, we assign 6Gb of RAM.
Ballooning is disabled.
Network
No changes are needed for the Network Tab as we will be configuring these later.
Create Virtual Machine
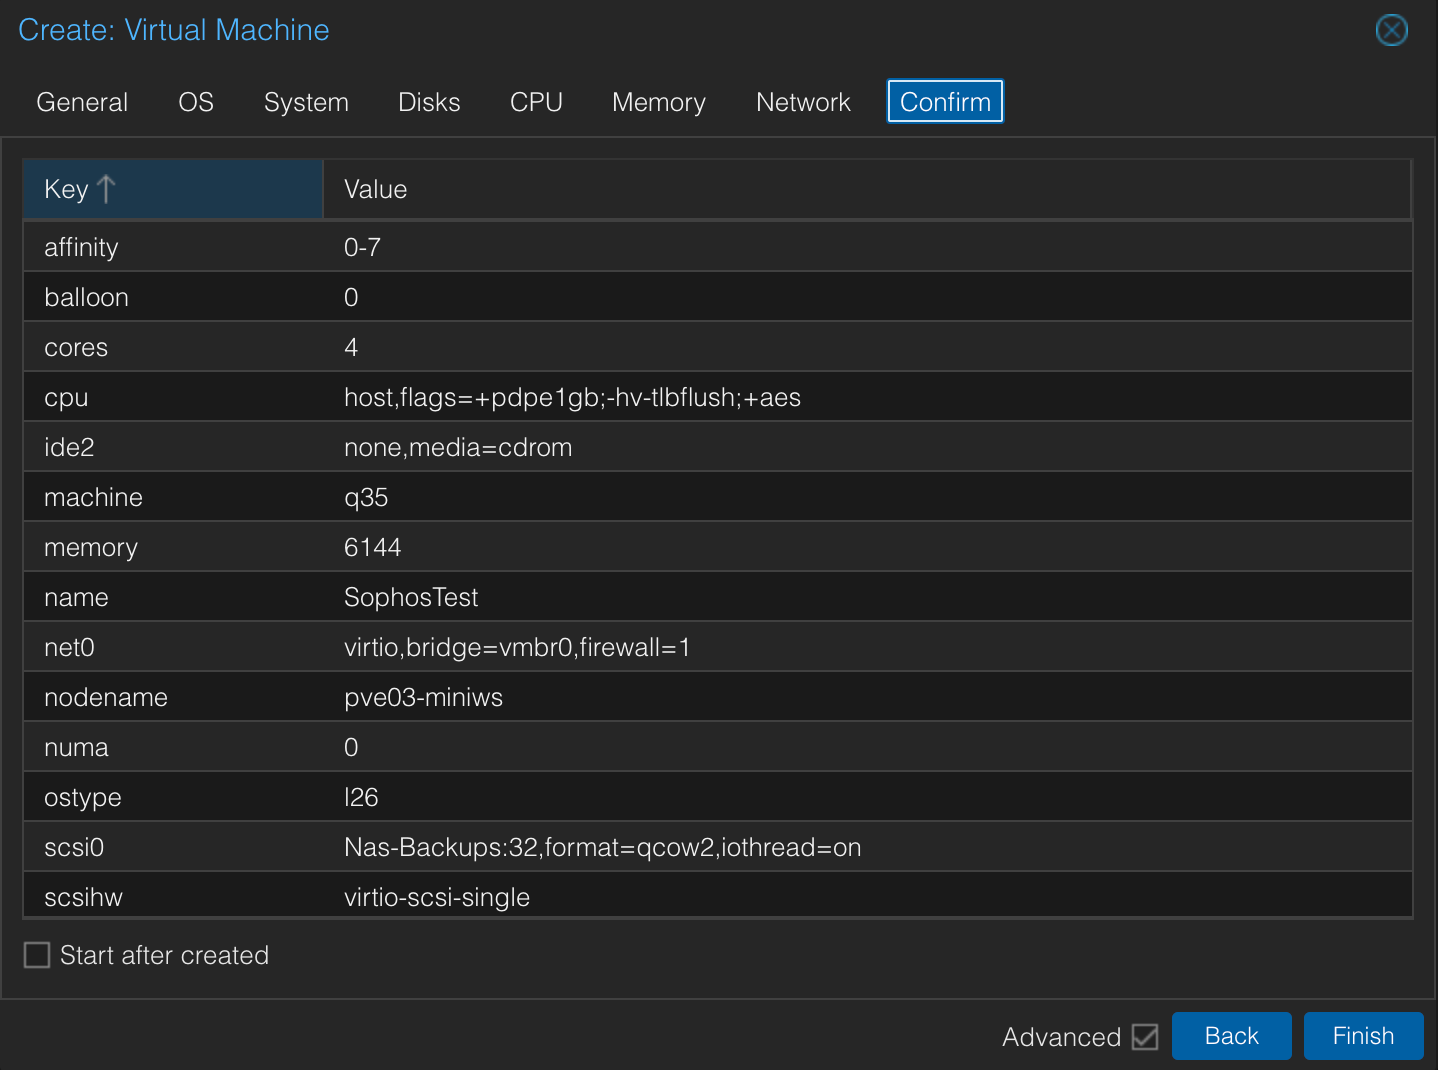
Disk transfer and assignment
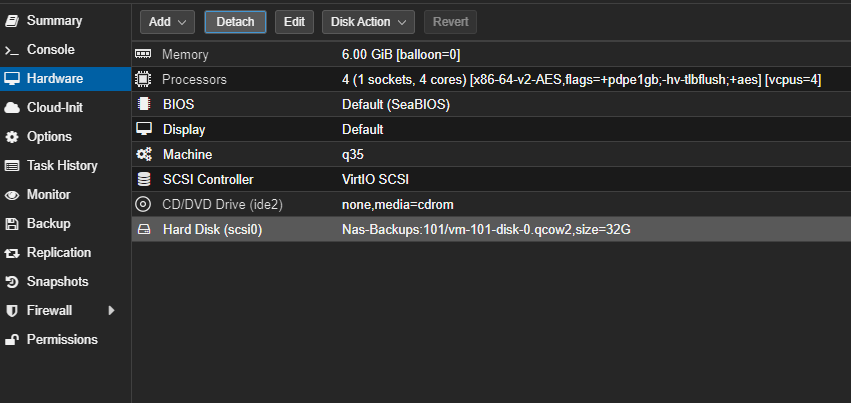
Remove default disk
Once the VM has been created you select the VM and under Hardware select Detach Disk and then Remove Disk.
This step can be done later when attaching imported disks, however, to avoid confusion I find it easier to complete it now.
Transfer Disks to Proxmox
Now that we have the VM created we need to transfer the two disks downloaded from Sophos earlier. I used WinSCP to log in to the root user of your Proxmox machine using the management IP address. Then you need to navigate to the following folder:
I had to add the quemu directory. Simply transfer both the primary and auxiliary disks extracted from the downloaded file.
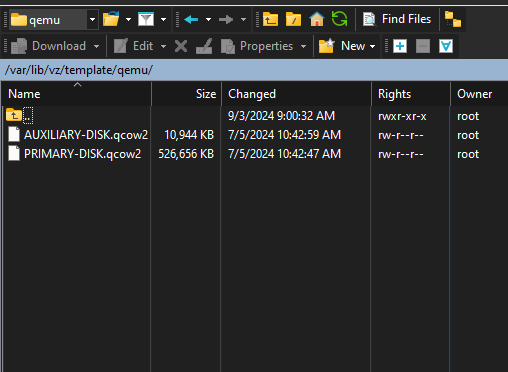
( Or you can use the cli to SSH and transfer that way if you are more comfortable with command line. )
Import Disks to VM
Back in the Proxmox Web interface you need to work in the Proxmox shell (Not VM console) For me, that is the device labeled pve03-miniws on the screenshots. Then click Shell. In the CLI you will need to input the following commands:
You will need to go to the directory created earlier and then use the qm importdisk command to transfer the disks to the Sophos VM local-lvm storage.
cd var/lib/vz/template/qemu
qm importdisk ### PRIMARY-DISK.qcow2 local-lvm
qm importdisk ### AUXILIARY-DISK.qcow2 local-lvm
Replace ### with the VM ID you picked in the beginning. In my instance that was 101.
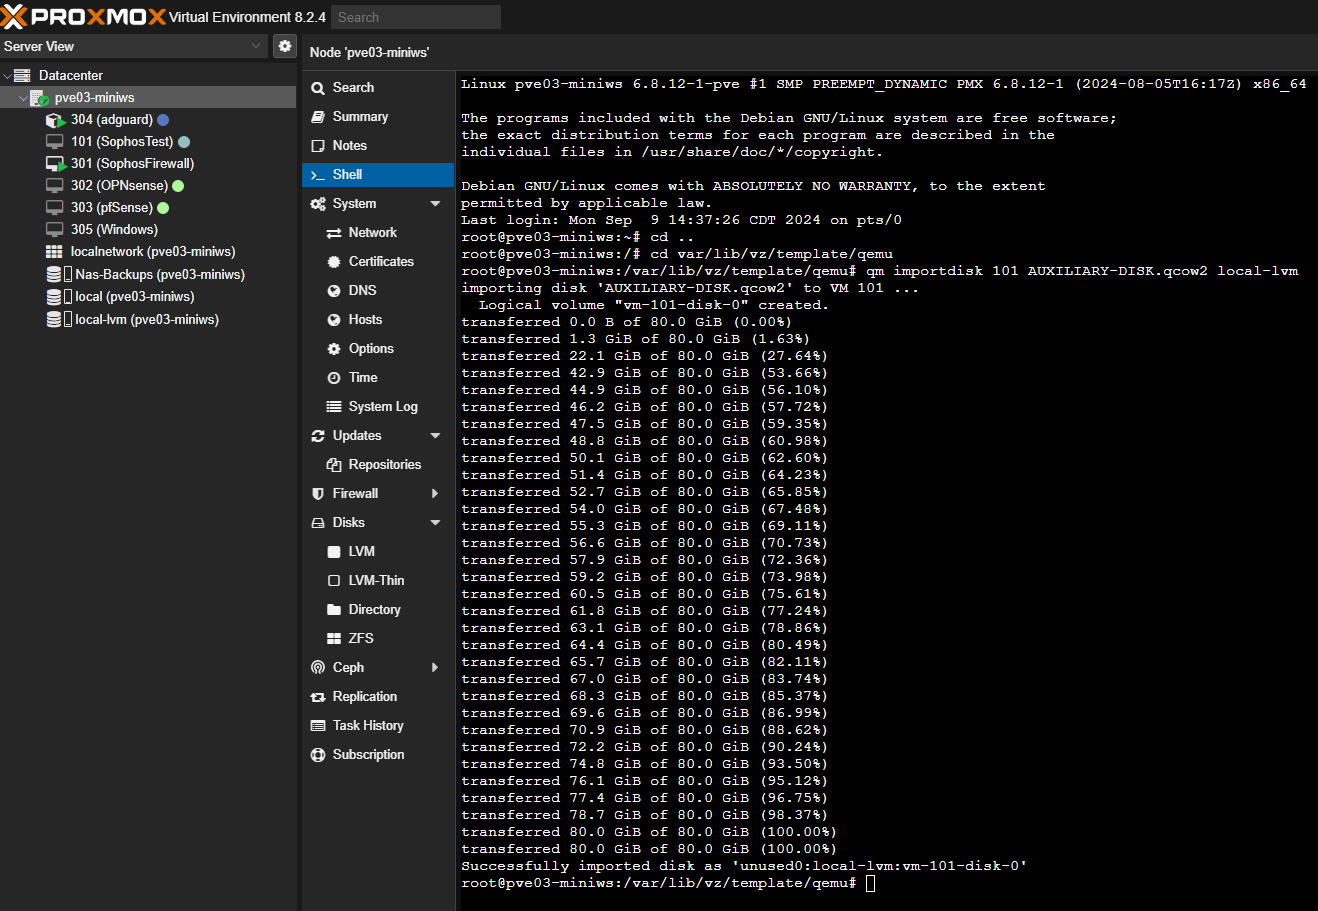
Assign new disks in the VM
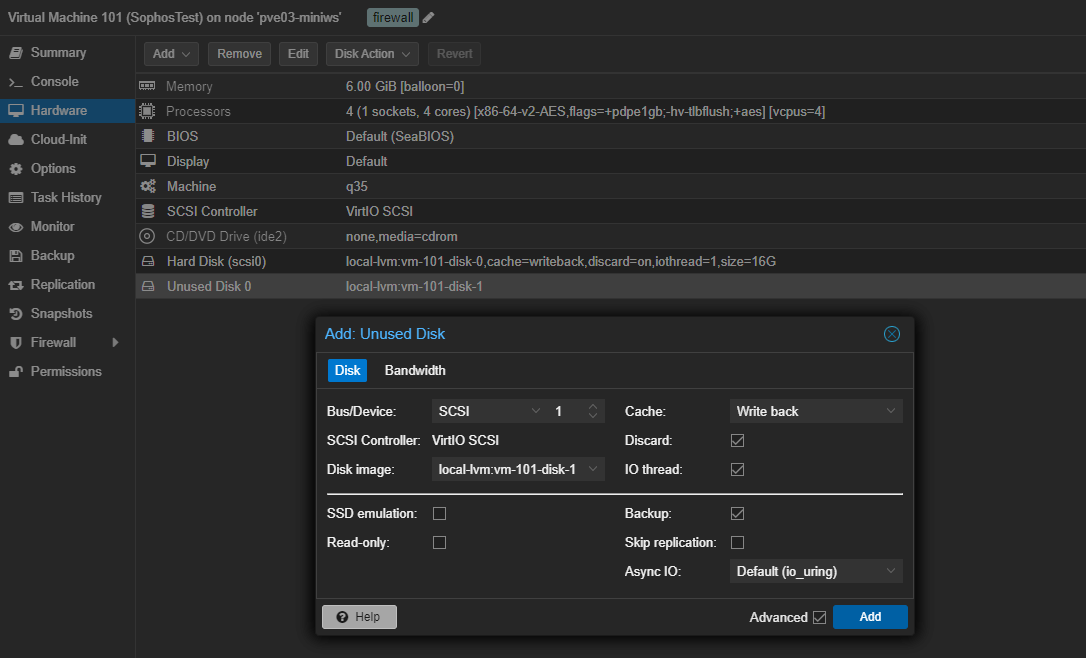
Back in the Proxmox web interface on the new VM Go to hardware click on each unused disk and assign them.
disk0 will be Primary so it should be assigned to SCSI 0
disk1 will be Auxiliary and should be assigned to SCSI1
I selected the following options
Cache: Write back
Discard: Selected
IO thread: Selected
When completed you will see that the scsi0 is 16G scsi1 is 80G size.
Network Interfaces
This will be different for every setup.
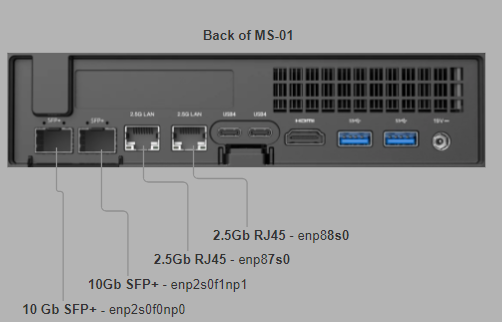
Of the four ports 1 I have dedicated one to the Proxmox host and any other VMs. This allows me to use the other 3 for the Sophos VM. I decided upon a 2.5g WAN and 10G LAN interface.
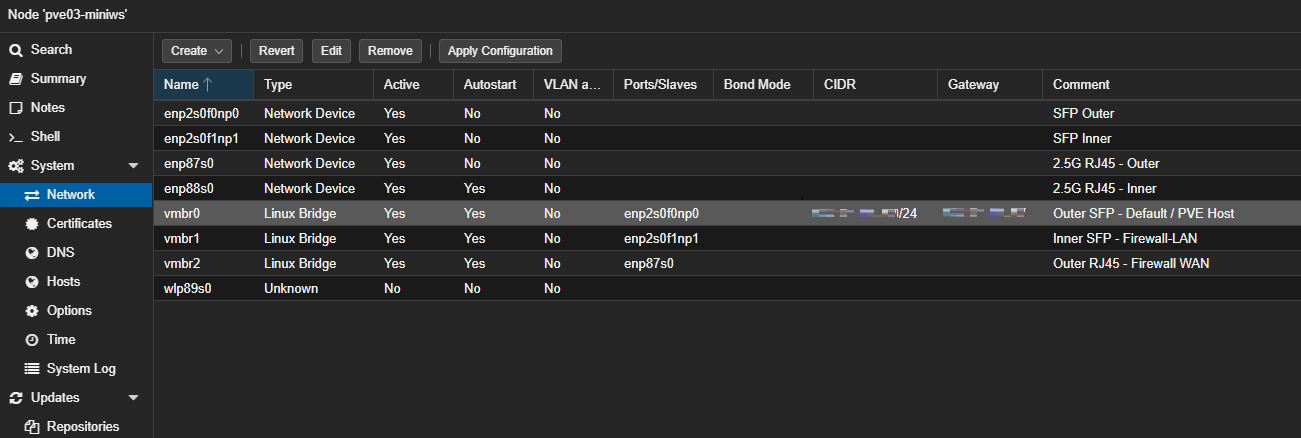
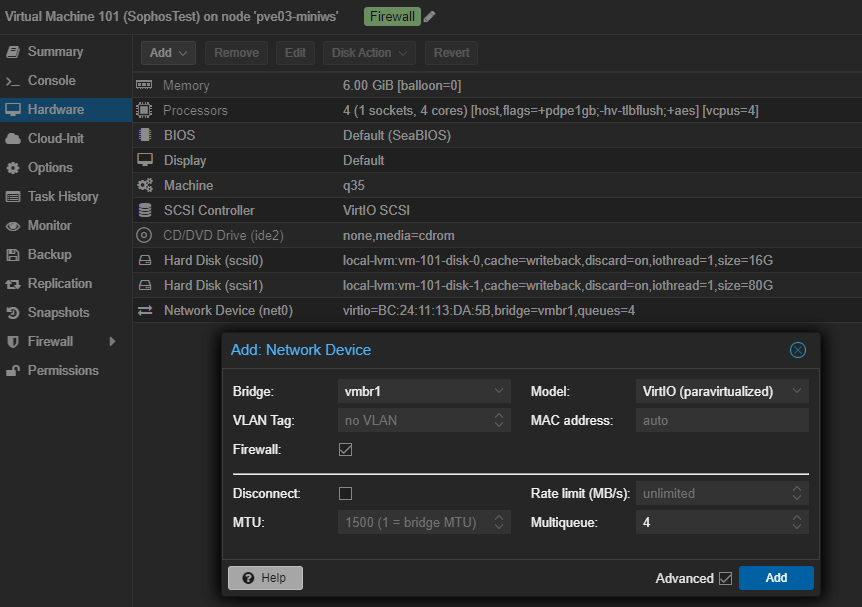
By default on Sophos, the first network card (net0) will be the LAN, and the second network card (net1) will be the WAN.
Under Advanced set Multiqueue to 4 for both interfaces. (the number of cores assigned to the VM)
Final Steps:
Boot Order and Startup Settings
The last couple of changes take place in the Options section of the VM.
You have to change the boot order for the VM to boot off the primary disk. In that same screen, you also need to enable Start at boot. Lastly set Start/Shutdown order to 1.
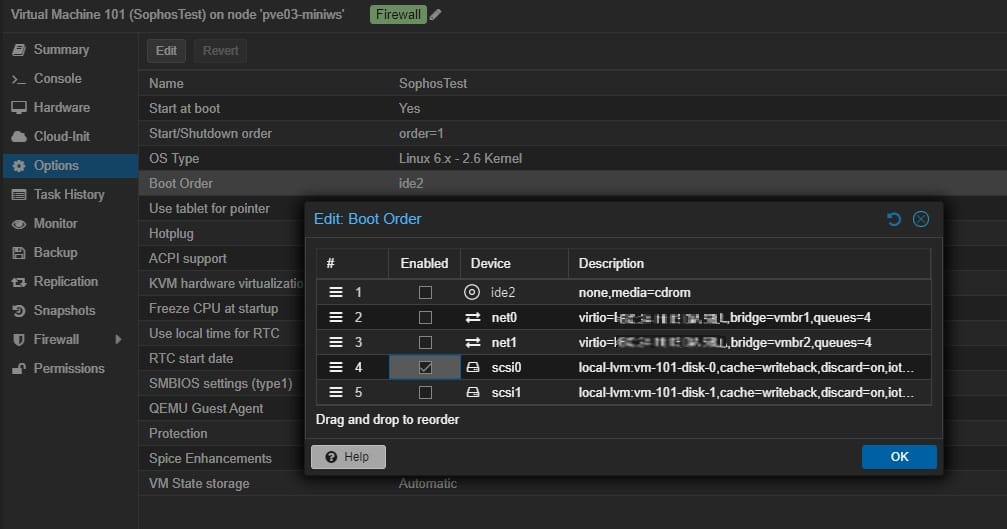
Startup and Console
At this point, you want to ensure the WAN and LAN cables are connected.
Select "Console" in the VM. Start the machine and watch it boot.
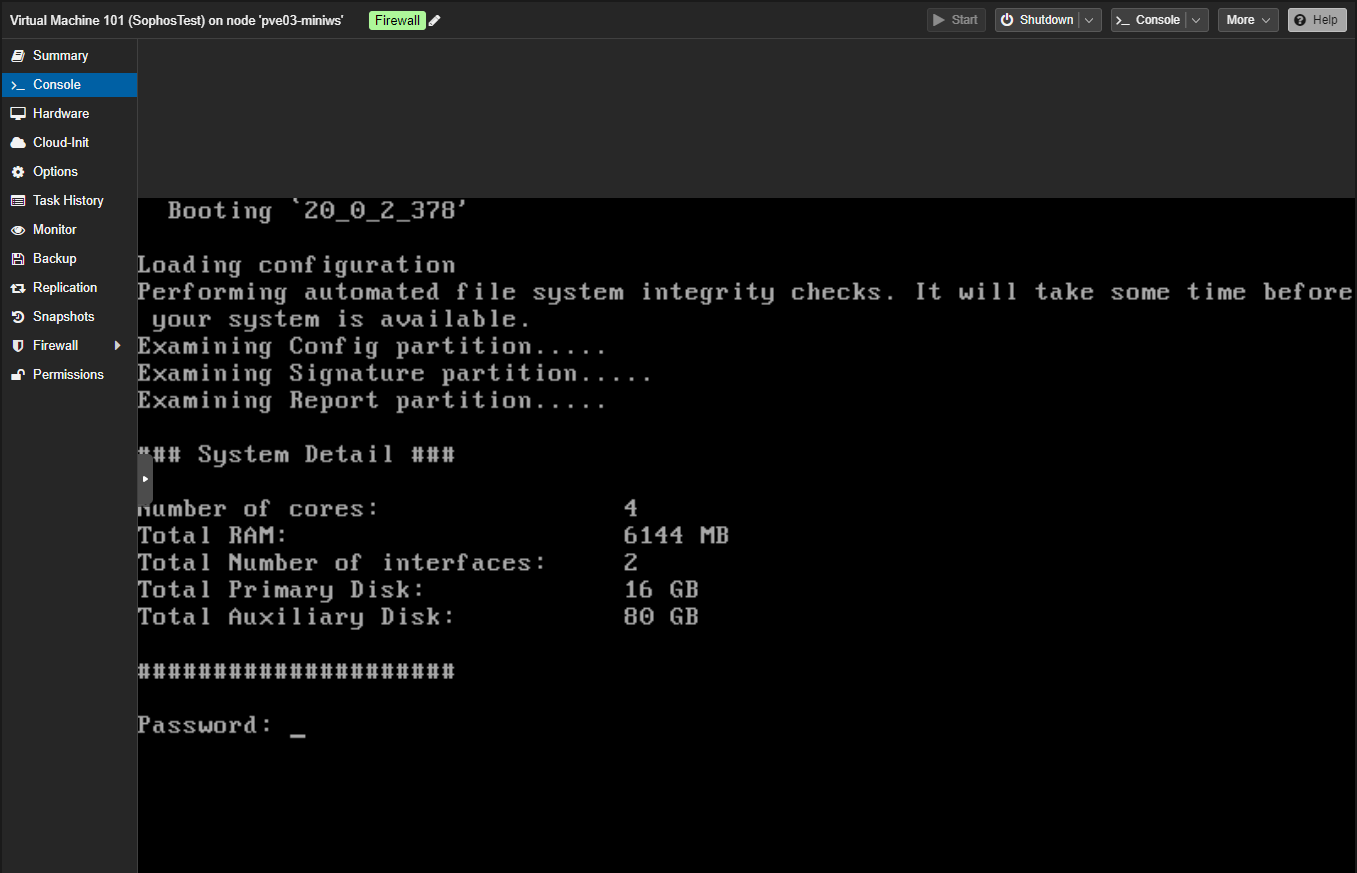
Verify that the WAN and LAN interfaces have IPs via the network configuration screen. (option 1)
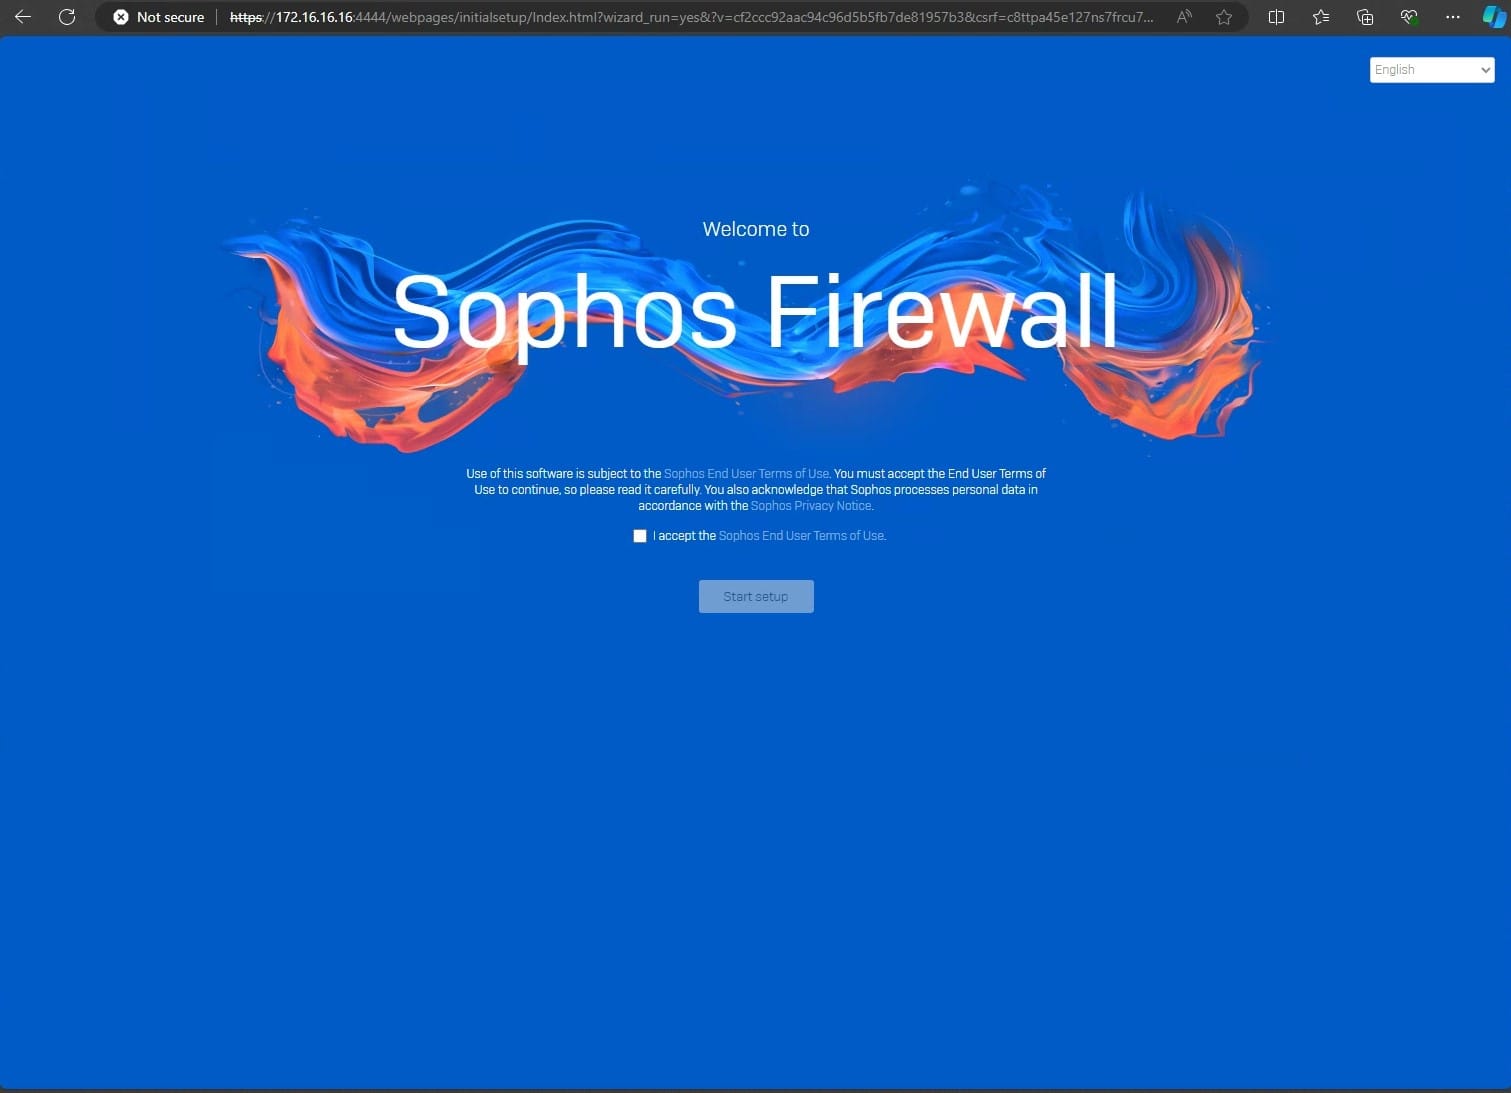
Proceed to a Computer Hooked up to the LAN of the firewall and proceed to 172.16.16.16:4444 on a web browser. Proceed past the Certificate SSL error and
you are now ready to accept the terms and proceed with firewall setup.
In the future, I may create a tutorial on how to set up the Sophos Firewall, however, that is something that can be found elsewhere relatively easily.
Thanks for making it this far. Feel free to leave a comment.
